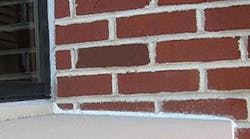
Masonry problems don’t have to hit you like a ton of bricks. With an inspection and maintenance plan in place, you’ll be able to pinpoint problems before they become severe and expensive to fix.
Take these steps so that when you identify an issue, you won’t be up against the wall.
Look for Moisture Infiltration
Look at your exterior wall system as an asset and adopt a preventive approach. It is recommended to perform annual or bi-annual walkthroughs to gauge overall condition. Knowledgeable in-house staff can conduct the inspection – otherwise it’s wise to enlist engineers or consultants.
Industry Advice on Maintaining Masonry
- Remove and replace torn, deteriorated, or inelastic sealants
-
When repairing mortar joints, surface grout hairline cracks and repoint damaged or deteriorating mortar joints
-
Repoint with prehydrated mortar, mixed drier than for conventional masonry work
- Remove ivy and plant growth that contributes to moisture penetration or deterioration of brickwork
-
Exercise care in opening existing weeps or drilling new ones to ensure that flashing is not damaged
-
Install a damp-proof course if missing or required
-
Install remedial anchors and ties in accordance with manufacturer recommendations
- Correct all deficiencies before application of external coatings
“An overall survey of the building will help determine the best moves going forward to ensure value and longevity,” says Leta Hardy, vice president of business development for Valcourt Building Services, a waterproofing and restoration firm. “Set it on your calendar, take photos, and document everything. This way, when a problem arises, you don’t have to be Sherlock Holmes.”
If you’re in a freeze/thaw climate, perform two inspections – once at the end of the freeze season in spring, and again prior to the next one in autumn.
“This allows you to see the effects of temperature change on the building. The same thing happens in tropical temperatures because of air conditioning on the interior and extreme heat on the exterior,” Hardy explains.
First, look at all sealants and flashing to make sure they’re diverting water as intended, Hardy suggests. As an absorptive cladding, masonry can tolerate more moisture than most, but once it reaches a certain saturation point, you’ll notice signs of damage.
“At the base of the brick wall, you can observe these freeze/thaw cycles,” says Brock Osborn, business development manager of reStore, the restoration program of the cladding and coating systems manufacturer Sto Corp. “After a threshold, masonry can start deteriorating.”
Most problems can be identified from visual cues, Osborn says. Cracks are a good indication that moisture infiltration has occurred, says Christopher Perego, industry sector manager of parking and restoration for chemical manufacturer BASF.
“The biggest mistake is to dismiss cracks. New buildings can expect a certain amount of cracking, but spider cracks are indicative of damage,” says Perego. “After those, it’ll just crumble.” PageBreak
A crack is always taking on water, Hardy adds, and every time it rains, moisture will get further into the system.
Pay attention to staining, too. It isn’t just unsightly. Stains indicate chemical efflorescence has occurred, which means moisture is present, Perego adds.
“Soluble salts are in masonry, but they can’t move unless they’re in solution,” he says, adding the stains will have a chalky appearance.
Avoid Replacement With Maintenance
Keeping a constant tab on your system allows you to perform minor repairs instead of having to take on drastic projects.
Moldy insulation and water inside will indicate moisture has infiltrated to the interior of the wall system, which requires a costly fix.
“There should be a maintenance protocol from the very beginning, because we don’t want to see full-scale removal and replacement,” Hardy says. “If you care for your building, you’ll catch problems in the early phases.”
Every five to eight years, it’s a good idea to completely re-caulk, Osborn adds.
Strong storm winds – in either Midwestern thunderstorms, or due to hurricanes on the coasts – can dislodge flashings, so make sure they’re doing their jobs before and after these events occur, Perego advises.
In addition to pointing out areas for repair, periodic check-ups also help with budgeting for the future.
“The owner who does inspections is best suited for capital planning because they can show the progress of degradation,” Hardy says. “They know that if they push repair off another year, it can dramatically increase the cost.”
Equally costly is implementing the wrong solution for a problem, such as applying a coating before the exterior is sound or using the wrong coating altogether, Hardy explains.
For example, only water repellents that permit evaporation and the passage of water vapor, such as siloxanes and silanes, should be used on exterior brickwork. Another mistake is thinking cracks or stains are simply poor aesthetics and require painting, which never solves the real problem.
“Prescription before diagnosis is malpractice,” Perego adds. “Once you see something happening, you need to understand why so you can address the root cause. You don’t want to spend money on a repair that doesn’t actually fix the problem because it could cause more damage.”
Although you may become adept at finding problems, remedying them likely requires outside help.
“The specific solution will be dictated by the type of building you have and the nature of your problem,” Perego explains. “There’s no cookie cutter approach because building are like trees. They’re everywhere, and they’re all different.”
Chris Curtland [email protected] is assistant editor of BUILDINGS.


