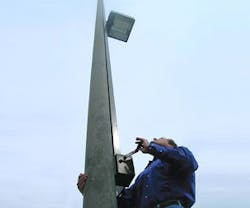
A few tweaks to your outdoor lighting will shed the best light possible on your facility, from parking lot light poles to the small fixtures lining walkways.
When you conduct yearly inspections and maintenance on your outdoor light fixtures, keep these three tips in mind to make this year’s job run more smoothly and next year’s shorter and simpler.
1. Upgrade Burned-Out Lamps
Start by replacing lamps that have burned out. An easy, fairly low-cost solution is to replace any medium-base incandescent lamps with screw-base CFLs, unless your building is in a cold climate where compact fluorescents are less effective, says Daniel Fernandez, Schneider Electric’s director of product management for AccuLite and NaviLite.
If your budget allows, consider replacing the fixture with long-lasting HID or LED lamps – their long lifetimes mean they require less frequent replacement, and the ensuing labor savings and lower energy consumption justify the slightly higher input cost.
“A good way to cut costs for lamp replacement in pole-mounted fixtures is to follow a relamping schedule and replace all lamps at the same time. This way, the cost of equipment transportation is reduced,” Fernandez recommends. “For all types of fixtures, another way to cut costs is to make sure the fixtures are not on when they are not supposed to be. A common way of dealing with lamps being on during the day is to use timers. Alternatively, photo sensors turn the lights on and off automatically.”
2. Apply a Little Elbow Grease
Once you’ve replaced those lamps, take a look at the ones that are underperforming. Check to see how clean the fixtures are. If any are significantly dirty, start cleaning – you may be surprised at the results.
“You lose a lot of lumens from just dirt and bugs,” says Kerem Tepecik, director of operations at the Dallas office of Retropole, a lighting device manufacturer.
Start with the glass or plastic lens, cleaning both sides thoroughly, Fernandez recommends. See if it’s possible to get any dirt off the internal reflectors. Then, check the gaskets to make sure they’re working as intended – if you find too much dirt inside the fixture, it could signal that the gaskets aren’t performing right.
“Typically, whenever the bulb is replaced, you’d hope the electrician would wipe the lens off, but it never happens,” says Tepecik. “I’ve walked up to many fixtures in many parking lots that have a bulb that’s working, but the fixture’s just filthy. You’re paying for the electricity, but you’re not getting the light.”
One environment-specific concern is highly important in coastal areas, where fixtures are subject to high amounts of moisture or exposure to salt or other corrosive contaminants. This can destroy the paint on the fixtures and compromise the mounting mechanisms.
Standard fixtures aren’t ready to stand up against the assault, so either make your existing fixtures more corrosion-resistant or talk with the manufacturer about solutions for coastal properties.
“There are special paints that can be used to make the fixtures more resistant and special hardware,” Fernandez says. “The building manager or owner should do his homework to select the correct fixture or communicate with the manufacturer.”
3. Make the Job Easier
If you notice that your fixtures are too far gone – there’s excessive corrosion, the mechanical integrity has been compromised, or the lenses are broken or missing – then replacing the fixture might be the only option. Sometimes replacement is less expensive than repairs.
If possible, invest in products that make the process faster or easier. For example, conversion kits for light poles allow you to lower fixtures to your level and perform maintenance on the ground instead of renting a truck.
“Every year, or maybe even twice a year, there’s a need for some contact or maintenance with the outdoor lighting,” Tepecik says. “It usually doesn’t get done nearly that often because it’s so expensive to get someone up there.”
Janelle Penny ([email protected]) is associate editor of BUILDINGS.
About the Author
Janelle Penny
Editor-in-Chief at BUILDINGS
Janelle Penny has been with BUILDINGS since 2010. She is a two-time FOLIO: Eddie award winner who aims to deliver practical, actionable content for building owners and facilities professionals.

